Sunday, October 17, 2010

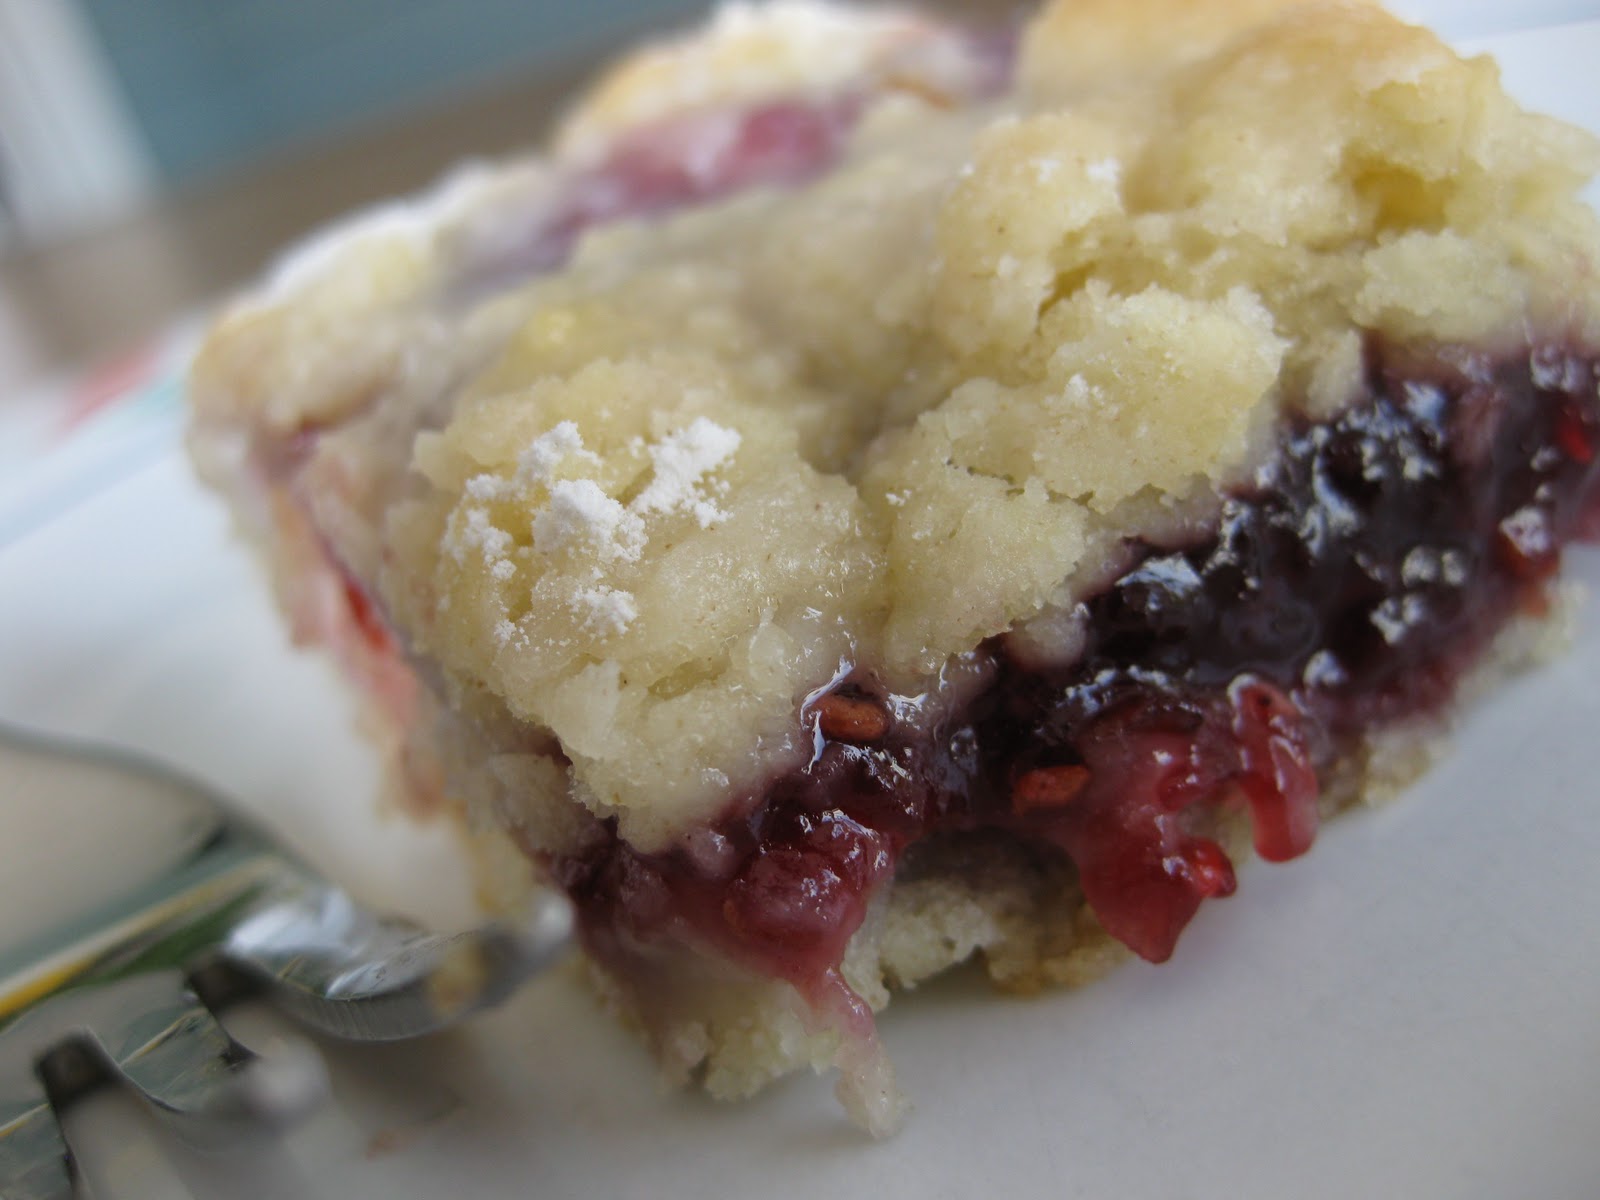
Raspberry Cream Cheese Coffee Cake

Photo by Uncle Worm
There are only a handful of treats Becky and I make over and over again: Oatmeal lemon creme bars, Friend E's chocolate chip cookies, oatmeal carmelitas, pumpkin chocolate chip cookies (post coming soon!). These are the recipes we can make in our sleep, and that disappear immediately when we put them out for others.


This Raspberry Cream Cheese Coffee Cake is another of those recipes because it's easy to put together and even easier to gobble up. The first time I made this recipe was for me, Beck, and the Music Man on a lazy Saturday morning. The three of us devoured it all in about an hour.

The second time I made this coffee cake was on a girls' weekend with our best friends from college. The six of us gals finished off the whole thing in less than an hour.

The third time I made this coffee cake was just this past Friday while at home for a family reunion. Our twelve or so aunts, uncles, and cousins inhaled it in what seemed like minutes.

Are you starting to see a pattern?

At this point, Becky and I decided this recipe was too good to keep to ourselves; we had to put it here on the blog. So, we made the cake for a fourth time, a mere 24 hours after its previous appearance. We got the cake in the oven and then I ran out on an errand, leaving Beck with strict instructions to not let anyone dig in until she got some photos.

I couldn't have been gone much more than a hour, but when I came back, there was only one teeny tiny piece left for me. It's like magic, really, how fast this coffee cake disappears.


Besides the fact that it's an excuse to eat dessert for breakfast, I love this coffee cake because it's adaptable. Don't have raspberry jam? Use strawberry. Use blueberry. Use lemon curd. Have some fresh fruit on hand? Throw that in, too.

This cake is also free form, which I love, because it's pretty darn hard to mess up the presentation when you're not aiming for a specific shape or size. And even if the finished cake isn't pretty, it tastes so good that nobody seems to care if it's ugly - they'll gobble it up no matter what.

Photo by Uncle Worm

But, to quote good old LeVar Burton, you don't have to take my word for it:

"Yummm!!!" – Cousin Rick (that's three m's AND three !'s)

"The first one was perfect. The second one was even better." – Cousin Gae

"I didn’t have any because it was GONE!" – DaddyBob

"I got goosebumps (really!) during the first bite." – Uncle Worm

"I couldn't wait for you to make it the second day!" - Cousin Don

"Are you moving back here?" - Mama B

"Affentitten geil!" which translates literally to "Ape-[bleep] good!", or figuratively to "As good as it can get!" - Aunt Daggi from Germany

Guten appetit!

- Katie


Raspberry Cream Cheese Coffee Cake

Coffee Cake:
2 cups all-purpose flour
2 teaspoons baking powder
1/3 cup sugar
1/4 teaspoon cream of tartar*
1/4 teaspoon salt
1/2 cup butter cut into small pieces and chilled
3/4 cup milk
4 ounces cream cheese
4 ounces raspberry jam
Note: To use a baking mix such as Bisquick, replace first five ingredients with 2 cups baking mix, adding a tablespoon of sugar.
*we've also used baking soda in a pinch

Powdered Sugar Glaze:
1/2 cup powdered sugar, sifted
1/4 teaspoon vanilla
1-2 teaspoons milk

1. Preheat oven to 375 degrees. Line a large baking sheet with parchment paper. Sprinkle generously with flour.

2. Place flour, baking powder, sugar, cream of tartar, and salt (or 2 cups baking mix plus 1 tbsp sugar) in a large bowl. Using a pastry cutter, cut in the butter until dough resembles course crumbs.

3. Add milk and stir until evenly moistened. Dough will be quite sticky.

4. Place dough on floured cookie sheet. Sprinkle generously with flour and pat or roll into a rectangle approximately 16" x 6".

5. Spread cream cheese down the center, then top with jam.

6. Using a sharp knife, make cuts from center of dough (where cream cheese and jam are) outward, about an inch and a half apart, all along both long sides of the dough.

7. Fold strips of dough up over the top of the jam. Pinch ends to seal.

8. Brush extra flour off parchment. Bake for 25 minutes or until nicely browned. Remove from oven and allow to cool 15 minutes.

9. While coffee cake cools, whisk together powdered sugar, vanilla, and one teaspoon milk. Continue to add milk until glaze reaches drizzling consistency.

10. Drizzle glaze over coffee cake in criss cross pattern. Slice cake along center of filling, then crosswise to cut into squares. Serve warm or at room temperature.

11. Store leftover coffee cake in the fridge (if there are any leftovers, which there won't be!)

Sunday, October 10, 2010

$1,000 Chocolate Toffee Pecan Cookies


Okay, so here's the deal with these cookies.

On Friday, it occured to me that Sunday would be 10-10-10. This made me notably happy. Back in August, I was also tickled about 8-9-10, (though not as tickled as I would have been had I been alive on 5-6-78). 


I think I've always felt this way about numbers. In the good old days of elementary school summer vacation, Beck and I used to call our friend M at 11:11am. We would just say "It's 11:11!", giggle, and hang up. The three of us also used to put on American Girl plays and fight over who got to be the one who died of cholera. I suppose we were slightly strange children.

To celebrate the perfection of 10-10-10, I wanted to bake a special treat. When I couldn't think of any baked goods with "10" in the title, I set out to find something based on 10x10x10, and happened upon this $1,000 award-winning recipe.


Folks, I can see why The Cowboy's Wife got a chunk of change for this creation. These cookies are GOOD.


In keeping with the 10-10-10 spirit, here are the Top Ten ways to describe these cookies' deliciousness:

10. These cookies are so good that after I tasted the first bite, I had to immediately pack up the rest to give away; the temptation to eat them all would have been too much.

9. These cookies are so good that after that first taste, I also texted Becky and described them using a swear word, and if you know me, you know that saying even H-E-double hockey sticks is rare.

8. These cookies are so good that if they were competing in the Olympics in the sport of yumminess, they would get 10s from all the judges, set a world record, and get the gold medal.

7. These cookies are so good that if they were elementary school students, they would get all 10s on their report cards (and 5 is usually the highest you can get).

6.  These cookies are so good that if they were competing to be the dying character in an American Girl skit, their fellow budding actors would let them have the coveted role.

5.  These cookies are so good that if I owned a bakery, I'd sell these for at least $2.50 a piece.

4.  These cookies are so good that I might need to churn some homemade ice cream so I can make ice cream sandwiches with the leftover cookies.

3.  Never mind about #4.  These cookies are so good that there won't be any leftovers.

2.  These cookies are so good that if I had a time machine, I'd set the dial to 10-9-10, just so I could make and taste these cookies for the first time all over again.

1.  These cookies are so good that I might just make them again for 1-11-11.


Have I convinced you how much I like these cookies yet? 


It makes sense that I would like these - the recipe is similar to Friend E's chocolate chip cookies, but instead of walnuts, these use pecans; instead of milk chocolate chips, milk-chocolate toffee bits.

One thing to note: these are large cookies. Resist the urge to make them smaller; the texture won't be nearly the same if you try to shrink the cookies. Plus, who really wants to shrink cookies?!

Happy 10-10-10, everybody. I hope you find your own creative way to celebrate!

- Katie


$1,000 Chocolate Toffee Pecan Cookies
Adapted from My Wooden Spoon
Makes 12 large cookies
(Okay, maybe 13 if you don’t eat any dough, but come on, let’s be realistic)

  • 2 c plus 2 tbsp flour
  • ½ tsp baking soda
  • ½ tsp salt
  • 12 tbsp butter, melted (1½ sticks)
  • 1 c light brown sugar
  • ½ c sugar
  • 1 egg, plus 1 egg yolk, room temperature
  • 1 tsp vanilla
  • 1 c semi-sweet chocolate chips (half of 12 oz bag)
  • 4 ounces English toffee bits (half of 8 oz bag)
  • 3/4 c chopped pecans, very finely chopped

1. Preheat oven to 325 degrees. Line your cookie sheets with parchment paper.

2. In small bowl, mix flour, baking soda, and salt. Set aside.

3. In medium mixing bowl, cream butter and sugars until well blended. Add egg, egg yolk, and vanilla and mix until blended. Batter will appear slightly greasy.

4.  With mixer on low speed, blend in flour mixture. Stir in chocolate chips, pecans, and toffee pieces. Chill dough for at least 45 minutes (longer if you're making a double batch).

5. Using a ¼ cup capacity measuring cup or ice cream scoop, drop dough onto cookie sheets 3 inches apart. (You should get no more than 3-4 cookies per sheet depending on the size of your cookie sheets). Bake for 17-20 minutes or until edges begin to brown. 

6. Allow to cool on cookie sheets for 2 minutes, then transfer to wire racks to cool completely. 

Sunday, October 3, 2010

Peanut Butter and Jelly Bars


Becky and I are PB&J kids. We ate peanut butter and jelly sandwiches just about every day from approximately first grade through, well, last year. On wheat bread, english muffins or bagels (never white bread), toasted if we were at home, peanut butter on both sides to keep the bread from getting soggy, with strawberry jelly. If we didn't have strawberry, it was raspberry for me; grape for Beck.


Then, one day, it occurred to us that we were basically eating sugar for lunch. We were no longer dancing eight hours a day. Instead, we were sitting in desk chairs on our bums, and those bums were getting bigger and bigger. 


So, our beloved PB&J was banished from the lunch-sphere and into the realm of treats.

And boy, are these PB&J bars a treat.


Do you remember that Peanut Butter Jelly Time video from 2002? The one where a banana bounces around the screen rapping about peanut butter jelly and a baseball bat? Remember how in your face it was?

Yeah. These bars are kind of like that.

In fact, if your taste buds could talk, they might say a bite of these bars is like getting hit with a...wait for it...peanut butter jelly baseball bat.


The dough for these bars comes together really quickly, and smells absolutely fantastic. But my favorite thing about this recipe is that if you buy an 18 oz jar of peanut butter, you don't even have to deal with the annoying mess of scooping peanut butter into and out of measuring cups; you just dump the whole jar in.

One recommendation: Because these bars are so sweet, definitely use raspberry jam or another jam with bite (i.e. not strawberry or grape). Otherwise, you'll be on such a sugar high that you'll start bouncing around like the dancing banana.

Gone are the days of Jif and Smuckers for lunch, but Becky and I always have been and always will be PB&J kids. Are you a PB&J kid, too? If so, make these bars and have a grand old peanut butter jelly time.

-Katie


Peanut Butter and Jelly Bars
adapted from Ina Garten
Makes approximately 36 bars

1/2 pound (2 sticks) unsalted butter, at room temperature
1 1/2 cups sugar
1 teaspoon pure vanilla extract
2 large eggs, at room temperature
2 cups (18 ounces) creamy peanut butter (I used one 18 oz jar Jif)
3 cups all-purpose flour
1 teaspoon baking powder
1 1/2 teaspoons kosher salt
1 1/2 cups (18 ounces) raspberry jam or other jam
2/3 cups salted peanuts, coarsely chopped

1. Preheat the oven to 350 degrees F.

2. Line a 9x13 inch pan with parchment paper, then grease and flour the pan, or spray with baking spray.

3. Sift together the flour, baking powder, and salt and set aside

4. Cream the butter and sugar on medium speed with mixer until light yellow, about 2 minutes. With the mixer on low speed, add the vanilla, eggs, and peanut butter and mix until all ingredients are combined.

5. With the mixer on low speed, slowly add the flour mixture to the peanut butter mixture. Mix just until combined.

6. Spread 2/3 of the dough into the prepared cake pan and spread over the bottom with a spatula or your fingers. Spread the jam evenly over the dough. Drop small globs of the remaining dough evenly over the jam. Don't worry if all the jam isn't covered; the dough will spread in the oven. Sprinkle with chopped peanuts.

7. Bake for about 45 minutes, until golden brown. Cool on wire rack, then chill in refrigerator until ready to cut. Lift bars out of pan onto cutting board using parchment and cut into squares. Store at room temperature or in the fridge.

Sunday, September 26, 2010

Apple Spice Cake


It still feels like summer around here (83 degrees yesterday!), but fall is starting to creep in, little by little. While summer is still my favorite season, there are lots of things I love about autumn in NYC:

1) I get to legitimately start thinking about what I want to be for Halloween. Anyone have any ideas?

2) I have an excuse to purchase a $5 pashmina or a $10 hat from the guy on the corner, because I "forgot" mine this morning and now I'm a little chilly.

3) APPLES.


I'm sorry, California, but your apples simply don't compare to the ones we get out here. Also, because we New Yorkers walk everywhere, our commutes take us right through the middle of farmer's markets. That means there are juicy, orchard-fresh, bigger-than-your-fist sized apples everywhere we go. And don't even get me started on the apple cider donuts...


Needless to say, I could barely wait until after Labor Day to try this apple spice bundt cake. The cake turned out beautifully: moist, dense, spicy with cinnamon, and with a pleasing variety of textures thanks to the chewy apple chunks and crunchy nuts. Since I was traveling with this cake, I paired it with a caramel glaze, but I'm sure it would also be fabulous served with vanilla ice cream and caramel sauce as the original recipe suggests.


In the end, I'm not sure I like this cake as much as mine and Becky's signature apple cake, which is more like carrot cake made with apples (hopefully we'll post that soon!), but this is definitely a crowd pleaser perfect for fall dinner parties, or even a brunch.


Now, if you'll excuse me, I can hear the apples in my fridge from all the way over here. They are screaming "Eat me! Eat me!" I think I'll go put one of them out of their misery.

-Katie


Apple Spice Cake
Cake adapted from Martha Stewart
Glaze adapted from All Recipes
Serves 10

For cake:
1 1/3 cups vegetable oil
3 cups all-purpose flour
2 tablespoons ground cinnamon
1 teaspoon baking soda
1 teaspoon salt
2 cups sugar
3 large eggs
3 to 4 Granny Smith apples, cored and cut into 1/2-inch pieces (3 cups)
1 cup chopped assorted toasted nuts, such as pecans and walnuts (optional)
1 teaspoon pure vanilla extract
Nonstick cooking spray with flour

For caramel glaze:
2 tablespoons butter
3 tablespoons heavy cream
1/2 cup packed brown sugar
1/2 cup sifted powdered sugar
1 teaspoon vanilla extract

To make cake:
1. Preheat oven to 350 degrees. Spray a 12-cup Bundt pan with cooking spray; set aside.
2. Sift together flour, cinnamon, baking soda, and salt; set aside.

3. Combine vegetable oil, sugar, and eggs; mix on high speed with an electric mixer until lemon yellow.
4. With mixer on medium speed, gradually shake in dry ingredients until just incorporated.

5. Add apples and, if desired, nuts, to batter; mix to combine. Add vanilla, mixing until incorporated.
6. Pour batter into prepared pan, and bake until a cake tester inserted in the center comes out clean, 75 to 90 minutes.

7. Remove from oven. Cool on a wire rack for 15 minutes. Invert cake onto rack; turn cake right-side up to cool completely on rack.

To make caramel glaze:
8. In a saucepan over medium heat, melt butter. Stir in heavy cream and brown sugar. Bring to a boil and boil vigorously for 90 seconds, or until sugar is a deep amber color. If you start to smell burned sugar, take the caramel off the heat immediately.

9. Remove from heat and beat in powdered sugar and vanilla. If mixture is too thick to pour, add more cream 1 teaspoon at a time.

10. Working very quickly, pour glaze over cake. (This glaze hardens super fast!)

Sunday, September 19, 2010

Blueberry Pie Ice Cream


Autumn officially begins this Wednesday, and in New York, I can feel it. "Why, hello there!" it says with a sly smile. "Why, hello!", I reply, "So nice to see you again!" I love this time of year - the cool breezes on my face, the here-then-gone explosion of color in the trees, and the lure of apple season right around the corner.

But I'm also sad to say goodbye to summer. No more picnics in the park. No more movies on the pier. And no more ice cream.


Well, you know me. At least less ice cream, and certainly not the kind I'm about to share with you. You see, the recipe below could only have been thought-up on one of those blissful, lazy summer days -  the kind when anything seems possible as the sunshine stretches out before you and you lean back in your chair with a monumental "life is good" sigh.


The credit for this one goes entirely to the Music Man. After enjoying a spectacular blueberry oatmeal crisp at the New Leaf Restaurant, my pie-loving creative genius of a boyfriend suddenly turns to me with a wild look of inspiration in his eyes and spews out the following: "What if we made ice cream that tastes like blueberry pie?!?! We could put, you know, little bits of pie crust in there! Yeah! Oohh! Yeah! That would be good! Let's do it! Do you have the stuff at home to do that?! Today?! We should do that!!!! That would be SO good!!! Don't you think that would be good!?!?!?!?!"


In fact, I did. And boy, was it GOOD. If my guy has more treat ideas like this one up his sleeve, we're going to make an even better pair than I thought. On multiple occasions I had to take the tupperware away from him so he didn't eat the entire thing in one sitting. And then, of course, I took it back out and ate more than I should have in one sitting.


So grab the last of those blueberries from the market and celebrate summer. Like this ice cream, it'll be gone before you know it.

-Becky

Blueberry Pie Ice Cream
Recipe by Becky, adapted from this recipe at Group Recipes and this recipe at Fine Cooking
Makes approximately one quart

For blueberry puree:
1 pint fresh blueberries
1/2 cup sugar
juice of 1/2 lemon

For basic ice cream:
2 cups heavy cream
1 cup whole milk
3/4 cup granulated sugar
table salt
5 large egg yolks

Mix-in:
1 frozen pie crust 

Directions:
1. Bake pie crust according to package directions. Allow to cool completely, then break into bite-size pieces and freeze until ready to use. 

Prepare blueberries:
2. Toss blueberries, sugar and lemon juice in a medium bowl. Cover and refrigerate for 2 hours, stirring every 30 minutes. 

Meanwhile, prepare the basic ice cream custard:
3. Pour one cup of the heavy cream into a medium bowl and set a fine strainer over the top. Place this bowl inside a larger bowl prepared with an ice bath.
4. Whisk egg yolks in another medium bowl.
5. In a medium saucepan, mix the rest of the cream with the milk, sugar, and a pinch of salt. Warm over medium-high heat, stirring occasionally, until the sugar dissolves and tiny bubbles begin to form around the edge of the pan, 3 to 4 minutes.

6. Slowly pour about a cup of the warm milk mixture into the egg yolks, whisking constantly (this tempers the egg yolks so they don't curdle). Then, pour the warmed yolks into the saucepan with the rest of the milk mixture.

7. Cook the custard, stirring constantly with a heatproof spatula, until the mixture thickens and coats the spatula. If using an instant read thermometer, it should read around 170ºF (77ºC). (TIP: To test the thickness of the custard, run your fingernail down the back of the spatula. Don't burn yourself! If the line remains intact, the custard is ready; if the edges start running back together, give it another minute.)

8. Immediately strain the custard into the cream, then stir the mixture over the ice bath until cool. Cover and chill while preparing the blueberry puree.

When blueberries are ready (after 2 hours in the fridge), combine with the custard and churn into ice cream:
9. Drain the juice from the blueberries. Stir juice into custard.
10. Puree the berries in a food processor until smooth. Stir berries into custard. Chill mixture in refrigerator for at least 1 hour.
11. Freeze in ice cream maker according to the manufacturer's instructions.
12. When ice cream is churned, quickly stir in pie crust pieces with spatula or wooden spoon. Transfer to air-tight container and freeze until thickened and hard, at least 2 hours. Keeps for up to 2 weeks.

NOTE: I more or less halved this recipe, using 2 eggs and just over 1/2 pint blueberries. However, I still used the juice of half a lemon and a whole pie crust. Yum!

Sunday, September 12, 2010

Classic Brownies


Labor Day is over. If kids hadn't started school before last week, they have definitely started by now (although, in NYC, school doesn't officially officially start until tomorrow, since last week was a one-day week due to the Jewish holidays. Seriously - the first day of school and then four days off. Really, NYC? Really?!)

I have a few friends whose kids started kindergarten this year. I'll skip over the part about how old this made me feel, and move right onto what made me feel young again: this week's treat.

You see, I went back to school this year too, to Baker's Kindergarten.


I know it seems a little extreme, going all the way back to Baker's Kindergarten. I consider myself a seasoned baker, afterall.

But what if I told you I had never ever in my life made a batch of brownies from scratch?

"Enroll that girl in Baker's Kindergarten right this minute!" is what you'd say.

So I did. And whadda ya know? The first (and only) assignment was to bake some classic brownies. (Funny, isn't it, how when you imagine your own school the assignments address exactly the skills you are lacking? :-)

And you know what? The brownies were dense and moist and fudgy just like brownies are supposed to be. I've graduated from Baker's Kindergarten! Aren't you proud, Mama B?


This is a simple recipe with dark chocolate cocoa powder and milk chocolate chips - a chocolate combo that works well in our house because it pleases Becky & me (lovers of all things dark chocolate) and Music Man (lover of all things milk chocolate). But this is also a great basic brownie recipe that could be suited to your unique tastes - I'm thinking M&M's next time. Or, since M&M's are soooooo kindergarten, perhaps something more sophisticated, like toffee bits or a cream cheese frosting.

Oh, who am I kidding? I love M&Ms just as much as I did in kindergarten! Perhaps I never graduated after all...  

Dark and Milk Chocolate Brownies
Slightly adapted from Baking Bites
Makes 16 brownies

1/2 cup butter, softened
2-oz unsweetened chocolate, chopped
1 cup sugar
2 large eggs
1 tsp vanilla extract
2/3 cup flour
3 tbsp cocoa powder
1/4 tsp salt
2/3 cup milk chocolate chips

1. Preheat oven to 350F. Line an 8×8-inch square baking pan with aluminum foil and lightly grease.

2. In a small, heatproof bowl, melt butter and chocolate together. Stir with a fork until very smooth. Set aside to cool for a few minutes.

3. In a large bowl, whisk together sugar, eggs and vanilla extract. Whisking steadily, pour chocolate mixture into sugar mixture. Stir until smooth. Sift flour, cocoa powder and salt into the bowl and stir until just combined. Stir in milk chocolate chips, then pour brownie batter into prepared pan.

4. Bake for 35-40 minutes, until brownies set and a toothpick inserted into the middle of the pan comes out with only a few moist crumbs, not batter, attached.

5. Cool in the pan completely. Lift brownies out by foil onto a cutting board and slice into pieces.

Sunday, September 5, 2010

Caramel Turtle Bars


Our good friend Buzz is getting married today!!! At a winery! In California! (We're a tad excited. Can you tell?)

I think it's safe to say that Buzz is our oldest friend, considering that we've known each other since before we even existed. Our moms were roommates in college all the way in Illinois, and somehow both of them managed to end up in the Bay Area after school. Then Buzz's dad introduced his friend (Daddy)Bob to Mama B, and the rest is history.


We obviously share a lot of memories with Buzz, but when looking for inspiration for a Buzz-themed treat, one memory stood out:

For mine and Becky's thirteenth birthday, Buzz's mom (our "Aunt" Jan) took us skiing. The trip required that we start our drive to the lodge in the middle of the night so we could make the most of our day on the slopes. When Aunt Jan woke us up for breakfast at some diner off the highway, we stumbled into a booth, still half asleep.


Maybe it was the turtleneck, maybe it was Buzz's sleep-heavy eyes - we don't really remember details. But at some point before our pancakes arrived, Becky glanced at Buzz and announced that she looked like a turtle. 

Yes - we all agreed. Buzz most definitely looked like a turtle.

And then we started laughing. And laughing. And laughing.


I honestly hadn't thought of that moment in years until Becky brought it up and said we should make Turtle Bars in Buzz's honor. But now that I think about it, it is a perfect example of our friendship with Buzz - we see each other at our worst and best, we can speak frankly when we need to, and most of all, we're silly and we laugh a whole lot.

The recipe for these bars may look as long as our friendship with Buzz, but each individual step is not all that complicated. The hardest part is waiting for them to set up properly before digging in.


Buzz and Doug - we love you and we wish you all the happiness two turtles...er...people, can have!

- Katie & Becky


Caramel Turtle Bars
Adapted from Fine Cooking
Makes about 4 dozen 1-1/2-inch-square bars

For the crust:
Non-stick cooking spray, vegetable oil, or melted butter for the pan
7 oz. (14 Tbs.) unsalted butter, melted and cooled to just warm
1/2 cup packed light brown sugar
1/2 tsp. table salt
9 oz. (2 cups) unbleached all purpose flour

For the caramel topping:
2 cups pecan halves, toasted and coarsely chopped (we used 1 cup each pecans and walnuts)
1 cup packed light brown sugar
3/4 cup heavy cream
4 oz. (1/2 cup) unsalted butter, cut into chunks
1/2 cup light corn syrup
1/4 tsp. table salt

For the ganache:
6 Tbs. heavy cream
2 oz. good-quality bittersweet chocolate, finely chopped (about 1/2 cup)

Make the shortbread crust:
1. Line a straight-sided 13x9-inch metal baking pan with foil, letting the ends create an overhanging edge for easy removal. Lightly coat the sides of the foil (not the bottom) with nonstick cooking spray, oil, or melted butter to prevent the caramel from sticking.

2. In a medium bowl, stir together the butter, brown sugar, and salt. Stir in the flour to make a stiff dough. Press the mixture evenly into the bottom of the prepared pan. Prick the dough all over with a fork.

3. Refrigerate the pan for 30 minutes (or freeze for 5 to 7 minutes), until the dough is firm. Meanwhile, position a rack near the center of the oven and heat the oven to 325°F.  You can also toast the pecans at this time if you have not already.

4. Bake the dough for 20 minutes, and then decrease the oven temperature to 300°F and bake until the crust is golden all over and completely set, about 15 more minutes.

Make the topping:
5. Sprinkle the pecans evenly over the crust.

6. In a heavy medium saucepan, bring the brown sugar, cream, butter, corn syrup, and salt to a boil over medium-high heat, stirring until all the ingredients are melted and smooth. Let the mixture continue to boil, without stirring, until a candy thermometer registers 240°F, about 6 more minutes. Turn off the heat and immediately (but carefully) pour the caramel evenly over the prepared crust. Let the bars cool completely, about 2 hours, before garnishing with the ganache.

Make the ganache:
7. Put the chocolate in a small heat proof bowl. In a small saucepan, bring the heavy cream to a boil. Remove from the heat and pour over the chocolate. Let sit for 3 minutes. Stir gently with a rubber spatula until combined and smooth.

8. Fill a plastic zip-top baggie with the ganache, snip the tip off a corner, and drizzle the ganache decoratively over the caramel bars (you don’t have to use all the ganache - [but why wouldn't you?!]; keep the extra in the fridge for 5 days). Let the ganache set for 30 minutes to an hour.

9. Carefully lift the bars from the pan using the foil sides and transfer them to a cutting board. Separate the foil from the bars by sliding a spatula between them. Cut the bars into 1-1/2-inch squares. They will keep at room temperature for 1 week. (Note: we found it easier to slice these bars after refrigerating them for a few hours.)